A garage floor coating doesn’t succeed or fail based on the coating alone. Evaluating the concrete, repairing cracks, mechanically preparing the surface, and addressing moisture all occur first, and each step directly affects how well a floor performs over time. When prep is done correctly, an epoxy floor coating can do what it’s engineered to do: protect your concrete for the long haul.
Step 1: Assess and Repair Cracks With Materials Designed to Move
Every experienced installer knows there are two types of concrete: concrete that’s cracked, and concrete that’s going to crack. Whether a slab is 30 days old or 30 years old, expansion and contraction are inevitable.
Because concrete moves, cracks should never be repaired with rigid patching materials. Before coating your garage concrete, cracks must be repaired using a flexible elastomeric filler. This allows the repair to move with the slab instead of resisting it, helping mitigate inevitable shifting that would otherwise telegraph through the finished coating and lead to premature failure.
Proper crack repair isn’t cosmetic. It’s structural preparation that protects the coating system above it.
Step 2: Diamond Grinding to Create a Proper Bond
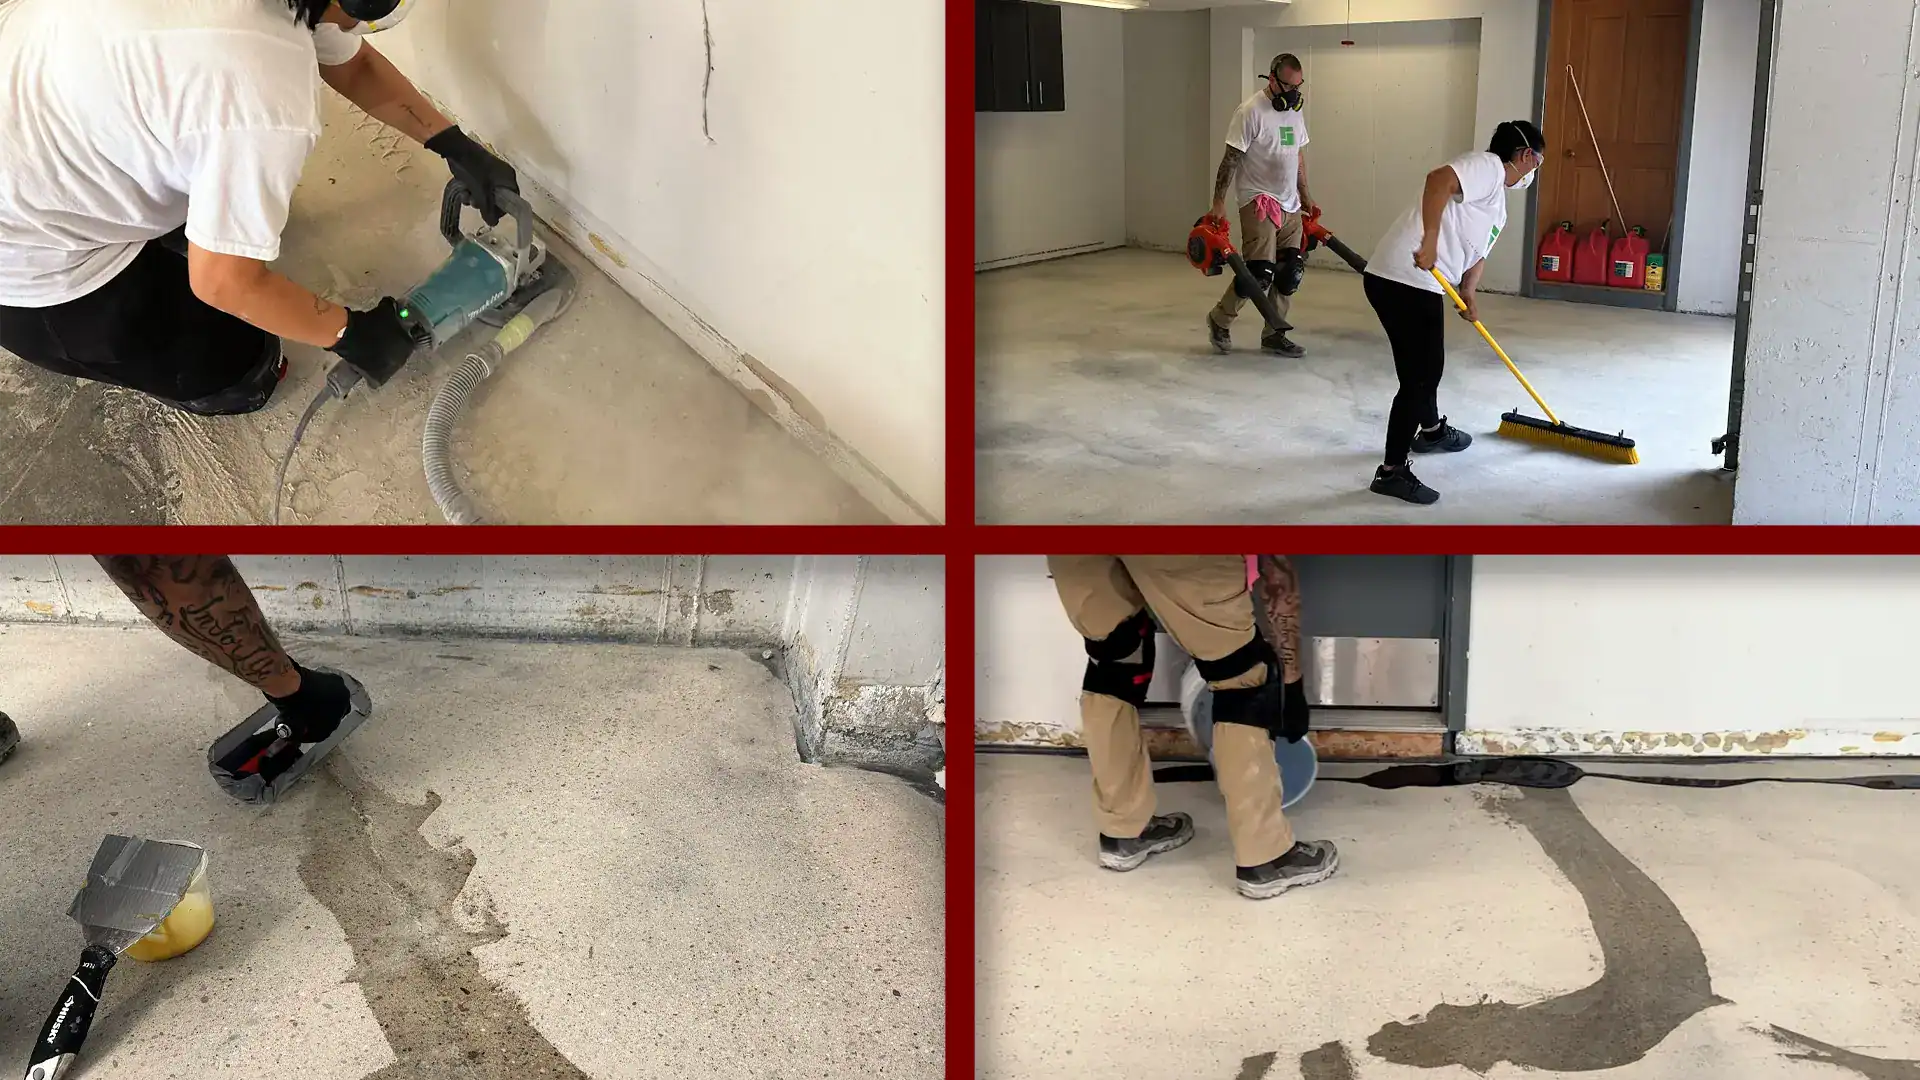
Once cracks are addressed, surface preparation begins. Sweeping, degreasing, and acid etching are not enough to properly prepare concrete for epoxy coatings.
Professional installers use diamond grinding equipment to create the correct concrete surface profile. Grinding opens the pores of the concrete, removes weakened or contaminated material, and exposes sound concrete beneath. This mechanical preparation allows the epoxy primer coat to form a true bond with the slab rather than relying on surface tension alone.
Skipping this step or substituting shortcuts is one of the most common reasons coatings peel or delaminate over time.
Step 3: Moisture Mitigation Beneath the Surface
All concrete contains moisture. Before applying epoxy floor coatings, installers should test moisture levels using calibrated meters. Moisture vapor rising through the slab is a leading cause of coating failure when it’s ignored.
When readings are elevated (and they almost always are), using a moisture-mitigating epoxy as the primer (base) coat is crucial. This primer slowly penetrates the concrete and protects the bond between the slab and the coating system above it. (Never accept the use of a quick-curing polyurea-polyaspartic as the base coat…a standard process in “1-day” systems). Use of the slower-curing epoxy is why high-quality systems often require 2 days installation instead of a rushed 1-day approach. Moisture mitigation is not a step that can be skipped without consequences.
What Happens After the Concrete Is Properly Prepared
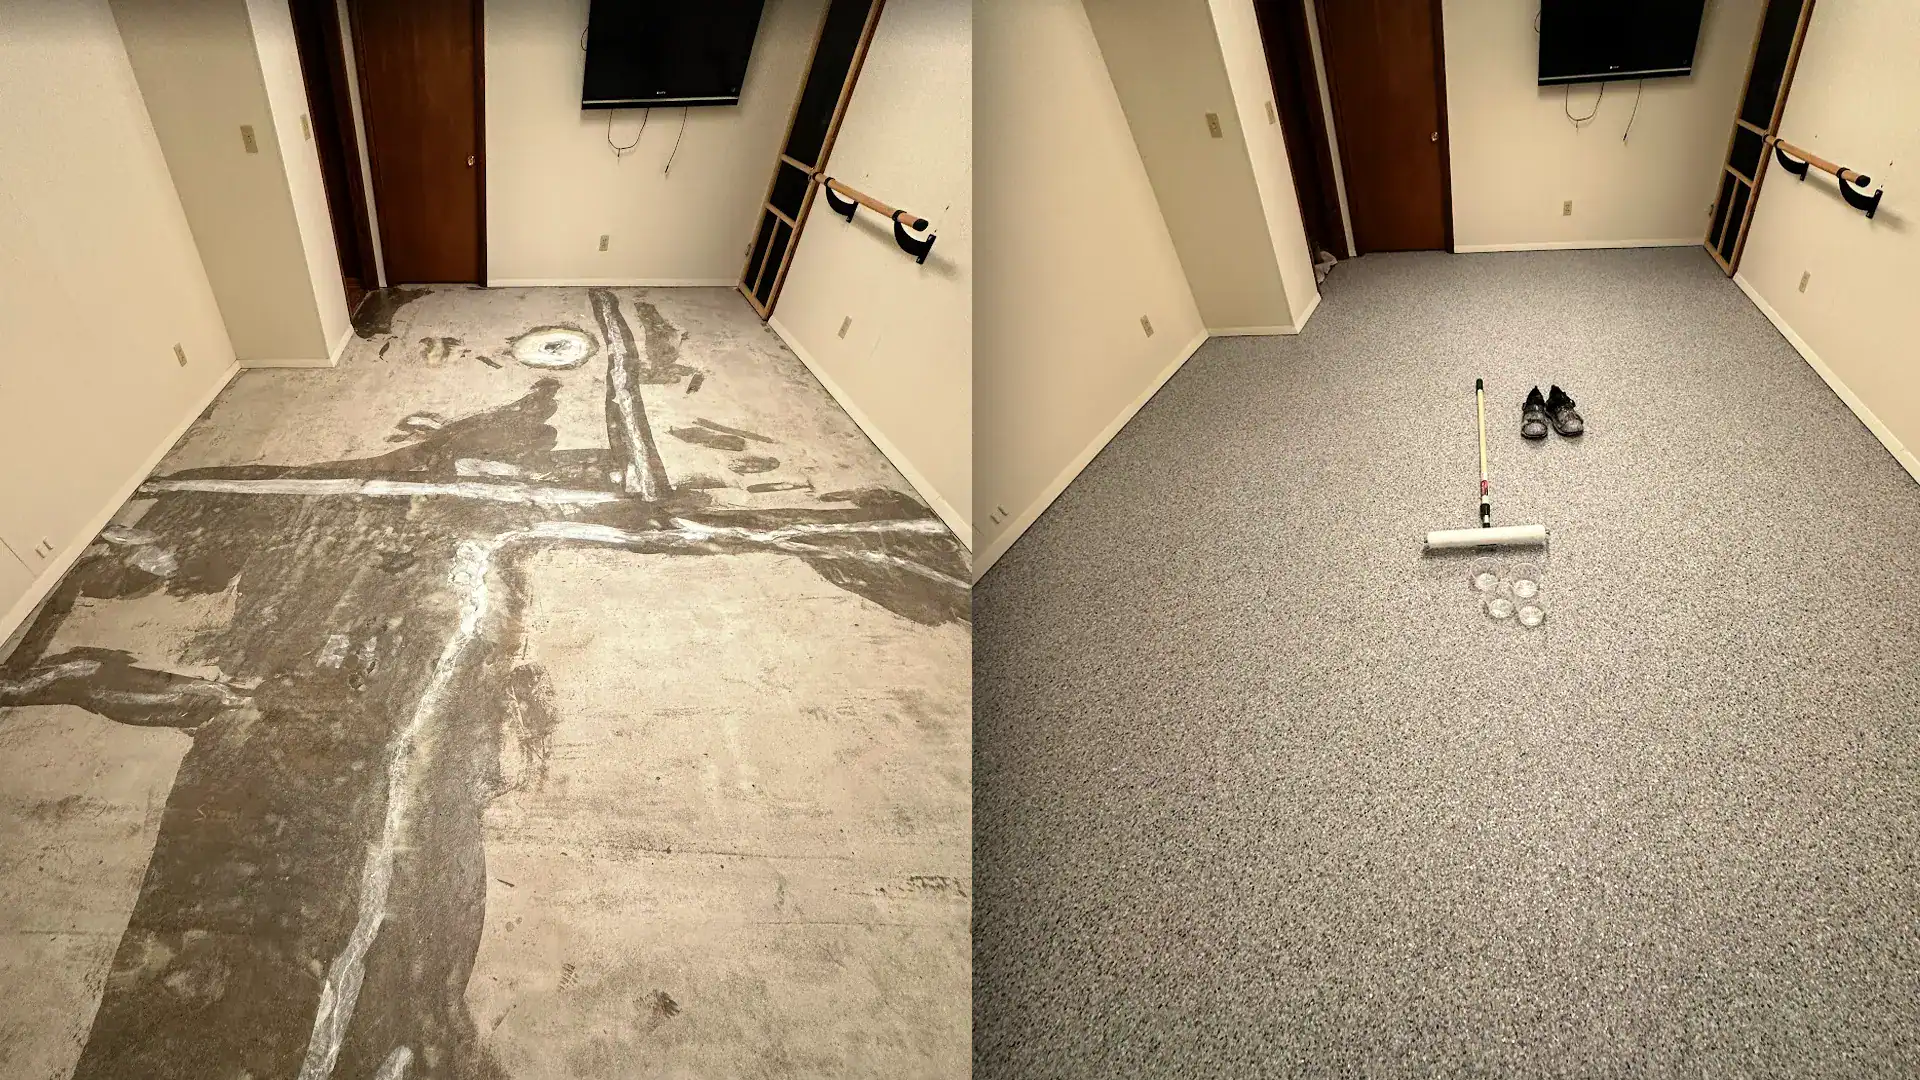
A professional epoxy floor coating is the result of a complete system, not a single product. From flexible crack repair and diamond grinding to moisture mitigation, decorative flakes, and high-performance topcoats, every step plays a role in long-term performance.
Once the concrete is repaired, ground, and protected with a moisture-mitigating epoxy primer, we broadcast a decorative flake layer into the base coat, adding texture, visual depth, and additional strength. This layer also improves slip resistance.
Finally, the floor is sealed with two UV-stable, 100%-solids polyaspartic topcoats. These topcoats are engineered to resist hot tire transfer, abrasions, spills, stains, and discoloration from sunlight. Together, these layers create a seamless, durable epoxy floor coating designed for real-world use, not just install-day appearance.
To help you plan with confidence, you can use the Live Coatings Visualizer to see how different coating styles and color blends would look in your actual garage before making a decision.
If you’re ready to learn more, reach out today to schedule a consultation. A properly prepared epoxy floor coating starts with the right process, and it shows in the results for years to come.
About the Author
Share this Post